Enterprise DDR5 memory & ultra-fast NVMe storage for high-performance hosting.
See plansMinecraft World Management, Backups & Restoration Guide
Protecting your server builds, player inventories, and economy data is paramount. The QeinTech Console provides both a dedicated **World Manager** for multi-world control and an automated **Backup System** for instant disaster recovery.
Whether you need to generate a fresh custom world seed, reset the Nether dimension after a major update, or roll back an accidental grief, you can manage everything directly in the browser.
Using the Built-In World Manager
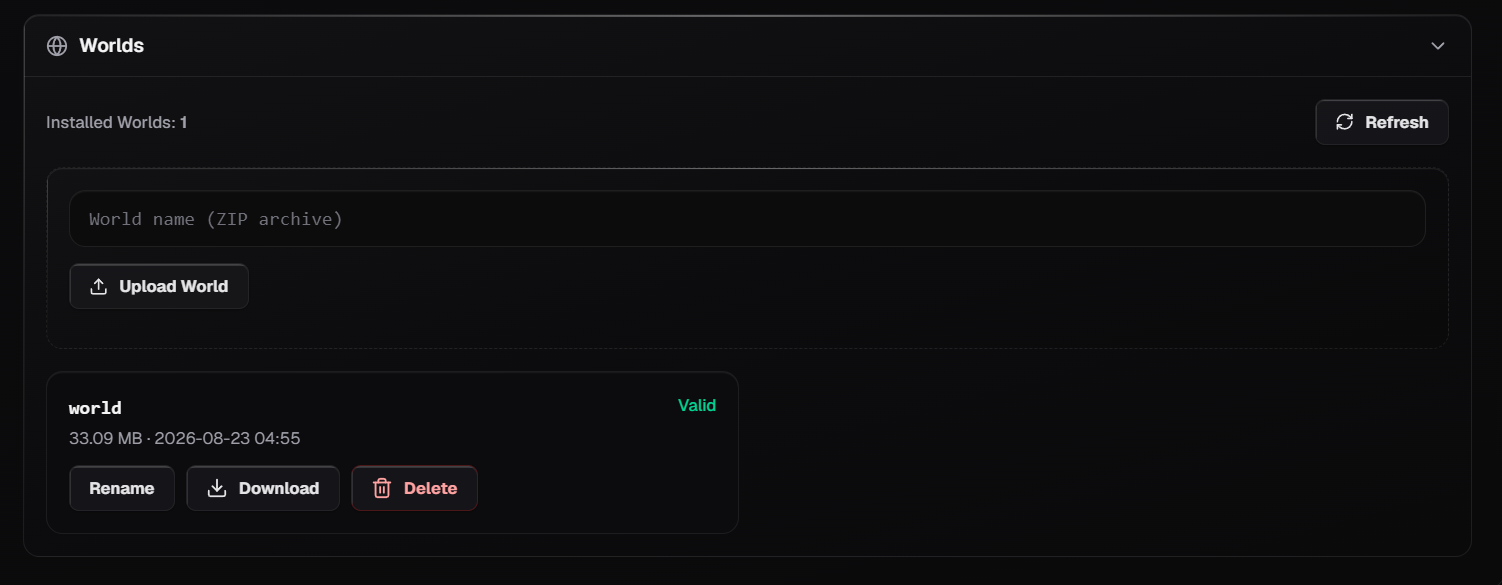
The World Manager tab gives you visual control over your world directories without needing to manually edit configuration files or rename folders over FTP.
1. Access the World Manager
Log in to the QeinTech Console, select your Minecraft instance, and click on the 'World Manager' or 'Worlds' tab.
2. Generate or Switch Active Worlds
Click 'Create World' to generate a new map with custom world generation settings, world types (Flat, Large Biomes, Amplified), or custom seeds.
3. Dimension Resets (Nether / The End)
To regenerate the Nether or End dimensions for fresh loot or dragon respawns, you can delete or reset individual dimension folders (world_nether or world_the_end) while preserving the Overworld.
4. Uploading Custom Maps
Upload custom adventure maps, hub lobbies, or singleplayer worlds by uploading a .zip archive via File Manager and extracting it directly into your root directory.
Automated Snapshots & 1-Click Backups
In addition to world management, QeinTech automatically generates offsite snapshots to protect your entire server against corruption, bad plugins, or disk faults.
1. Create a Manual Snapshot
Navigate to the 'Backups' tab and click 'Create Backup'. Give the snapshot a descriptive name (e.g. 'Pre-1.21-Upgrade').
2. Lock Critical Backups
Click the lock icon on important snapshots to protect them from automated daily retention pruning.
3. One-Click Rollback
If an issue occurs, click 'Restore' beside any saved snapshot. The panel will automatically extract the clean state and restart your server.
Backup Best Practices
- Back up before major changes: Always create a snapshot before updating Minecraft versions or testing experimental modpacks.
- Download offline copies: Periodically download backup archives to your local machine via the Backups tab or SFTP.
- Monitor platform health: Check scheduled maintenance windows on our System Status Page.
- Need help restoring an archived world? Contact our technicians on Discord or via Contact Support.
Still have questions?
Our engineering team and Discord community are available 24/7.